
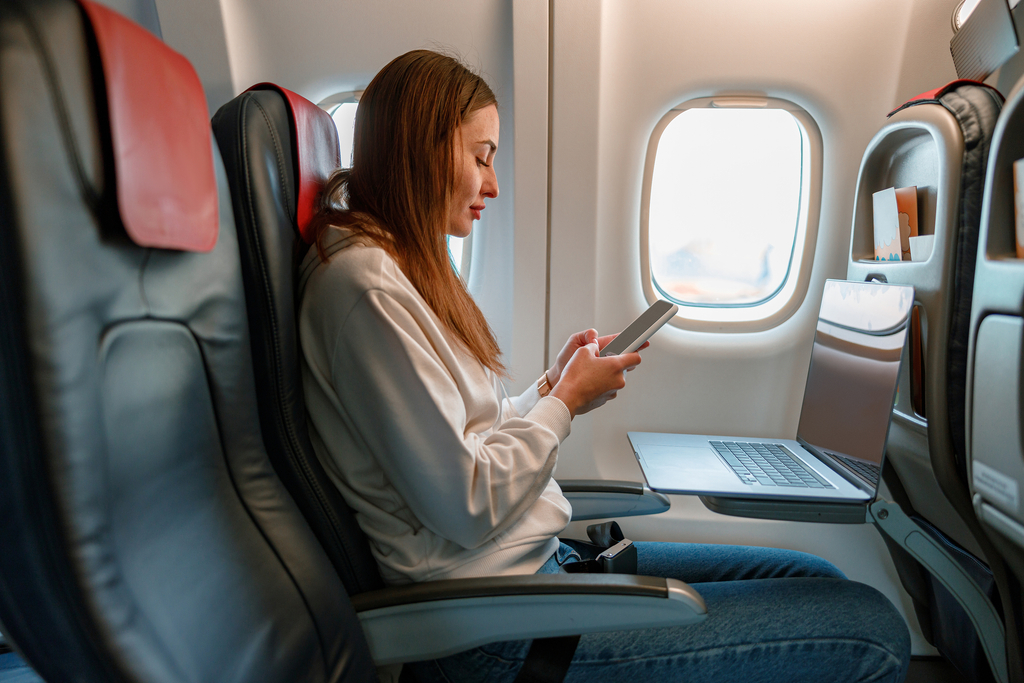
You are on a flight, deep in a spreadsheet full of client pricing. The person in the next seat glances over. Or you are in a coffee shop, reviewing a contract, while the table beside you keeps sneaking looks at your screen. Shoulder surfing is one of the most common — and least talked about — privacy threats for laptop users, and it costs nothing for a stranger to read everything you type, open, or scroll through.
A macbook privacy screen protector stops that problem at the hardware level: no software to configure, no battery drain, no VPN. It is a thin film or tempered-glass overlay that narrows your screen’s viewing angle, so only the person sitting directly in front of it sees a clear image. Everyone off to the side sees a dark, unreadable surface.
But when you start shopping, you meet a confusing choice: 30° vs 60° viewing angle. What does the number actually mean? Which one keeps your data safer? And which one should you buy for your MacBook? This guide breaks down the difference in plain language, compares the trade-offs, and helps you pick the right angle for the way you actually work.
What Is a MacBook Privacy Screen Protector?
A privacy screen protector is a physical layer that sits on top of your display and controls how light leaves the screen. Instead of letting the image spread in every direction, it funnels light into a narrow “cone” directly in front of you. Anyone inside that cone sees your screen normally; anyone outside it sees mostly darkness.
For MacBook users, the appeal is obvious. MacBooks are slim, bright, and travel everywhere — planes, trains, coworking spaces, hotel lobbies, client meetings. Any of those places can put a stranger’s eyes within reading distance of your display. A macbook privacy screen protector turns your laptop into a private workstation no matter where you sit.
Modern privacy protectors are available in two main constructions:
- Film (PET) — thin, light, flexible, and easy to trim to your exact screen size; often preferred by people who want a minimal profile.
- Tempered glass — thicker and sturdier, offering scratch protection in addition to privacy, with a more premium feel under the fingers.
Both use the same underlying technology to control viewing angle, which brings us to the most important part.
How Micro-Louver Technology Works
The secret inside every privacy screen is a layer of micro-louvers. Think of thousands of microscopic vertical blinds laminated into the film or glass. These tiny slats are so fine they are invisible at normal viewing distance — but they do a very specific job.
Light that travels straight forward, from the screen to your eyes, passes cleanly between the slats. That is why the person in front of the laptop sees a bright, crisp image. Light that travels sideways, however, hits the walls of the slats and gets absorbed or blocked before it can reach a viewer standing to your left or right.
The practical result:
- Straight on (0°) — clear, bright, fully readable.
- From the side (30°–45°) — the image dims and distorts as the louvers begin to close off the light path.
- Far to the side (60°+), with a tight-angle filter — the screen looks dark, almost black.
Because the effect is physical, it is instant and permanent. There is no toggle to forget, no mode that fails to engage. The moment the protector is on, the screen is private — which is exactly what you want on a laptop that lives in public spaces.
Viewing Angle, Explained
When a brand says a filter offers a “30-degree” or “60-degree” viewing angle, it is describing the width of that clear cone measured from the screen’s surface. Two conventions are commonly used, so it helps to read the spec carefully:
- ±30° means 30 degrees to the left plus 30 degrees to the right — a total clear cone of about 60°.
- 30° total means roughly 15 degrees each side — an extremely narrow cone, reserved for high-security settings.
In everyday marketing language, though, “30°” and “60°” are usually shorthand for the two broad families of privacy filters:
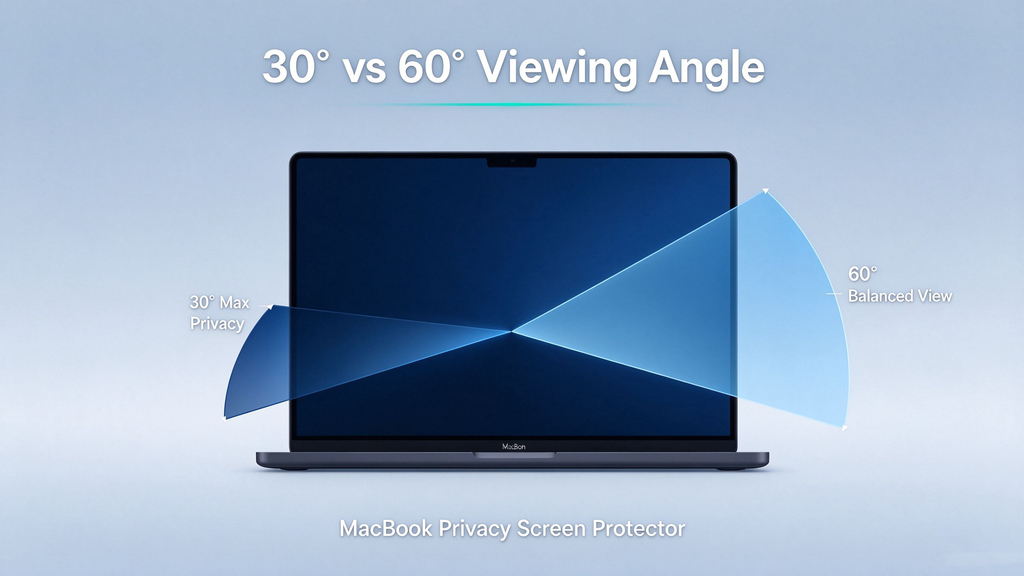
- A 30° filter = maximum privacy, a tight cone, aggressive darkening to the sides.
- A 60° filter = balanced privacy, a wider cone, gentler on brightness and color.
Understanding that difference — and matching it to your environment — is the real decision you are making.
The 30° Viewing Angle: Maximum Privacy
If your priority is absolute confidentiality, the 30 degree privacy screen is the stronger choice. With a 30° filter, the clear viewing cone is very narrow — effectively only the person seated directly in front of you can read the screen. Anyone leaning in from the side, sitting at an adjacent desk, or walking past your table sees a dark or blacked-out display.
This is the classic choice for:
- Financial and accounting work (client figures, payroll, tax documents)
- HR and legal documents (contracts, salaries, case files)
- Sensitive product plans, pricing strategies, and unpublished designs
- Public transit and travel, where strangers sit close for long stretches
The trade-off is real: because the louvers are denser and more aggressive, a 30° filter tends to reduce perceived brightness and can slightly affect color accuracy when you are viewing off-axis. In practice, most users find the front-on image still perfectly usable — you just give up a little flexibility in return for a lot more security.
If you frequently handle data that you would never want a stranger to see, the 30° family is the one that will let you sleep at night.
The 60° Viewing Angle: Balanced Visibility
A 60° filter still blocks side viewing — but it allows a wider cone of visibility before the screen darkens. Someone looking over your shoulder from a typical “peeking” position will still struggle to read the content, because the image is dimmed and distorted from the side. But you, sitting at the screen, enjoy better overall brightness and more accurate colors, because the louvers are less restrictive.
The 60° option suits:
- Creative and design work, where color fidelity matters (photo editing, illustration, UI design)
- Shared or collaborative spaces, where a colleague may need to glance at your screen now and then
- Users who find 30° filters too dim for their taste
- Everyday office work with moderate confidentiality needs
Think of the two as a spectrum: 30° is “maximum security,” while 60° is “security with comfort.” Both stop shoulder surfing; the difference is how much side visibility you are willing to give up to do it.
30° vs 60° at a Glance
Here is the short version. A 30° filter delivers maximum privacy: the clear cone is narrow, the side darkening is aggressive, and anyone outside roughly 15–30 degrees on either side sees a dark or black screen. The cost is a modest reduction in brightness and a small shift in color accuracy. A 60° filter still blocks shoulder surfing, but it keeps a wider cone of visibility, preserves brightness and color much better, and suits collaborative or design-heavy work. In short: choose 30° when confidentiality is non-negotiable, and choose 60° when you want strong privacy without visibly changing your display.
How to Choose: Match the Angle to Your Work Style
There is no single “best” angle — there is only the angle that matches how and where you work.
Choose 30° if: you work with confidential numbers, personal data, contracts, or unreleased product information on a regular basis; you spend long hours on planes, trains, and in open-plan spaces; or you simply prefer the strongest possible protection and do not mind a modest brightness reduction.
Choose 60° if: your work is creative or visual and accurate color matters; you regularly collaborate with colleagues who need to see your screen; or you want strong privacy without noticeably changing how your display looks.
A hybrid tip: many users keep a 60° filter on their main laptop for day-to-day comfort, then switch to a 30° filter for specific trips or projects. Since most filters attach and detach cleanly (magnetic or slide-mount options exist), you are not locked into one level forever.
Compatibility: Finding the Right Fit for Your MacBook
A privacy filter only works if it fits your screen properly — gaps let light leak around the edges and ruin the effect. Fortunately, the market is mature, and you can find a macbook pro privacy filter for virtually every current model:
- MacBook Air 13″ (M1/M2/M3/M4) — slim film options that tuck flush against the display.
- MacBook Pro 14″ — a very common size with a wide selection of both film and glass protectors.
- MacBook Pro 16″ — larger filters that are usually sold in magnetic mount form for easy on/off.
- Older 13″ and 15″ Pro models — still well supported by most major brands.
When you shop, always match the protector to your exact screen size and aspect ratio. If you use a macbook privacy screen protector with a magnetic frame, you also get the bonus of being able to remove it for movie nights or color-critical work in seconds. And if you often dock your MacBook to an external monitor, consider a second filter for the monitor — a privacy protector is only as good as every screen you use.
Installation and Care Tips
Getting a perfect install is easier than it looks:
- Clean the screen first. Use a microfiber cloth and the included cleaning wipe. Dust trapped under the film is the most common cause of a “bubbly” look.
- Work in a dust-free zone. Bathrooms and kitchens are surprisingly dusty; a clean desk by a window is better. Many filters ship with dust-removal stickers — use them on the screen right before applying.
- Align from the top edge. Hinge the filter into place from the top, then slowly press downward to push air out.
- Squeegee bubbles outward. Most kits include a plastic squeegee card; work from the center toward the edges.
- Be mindful of brightness. Because privacy filters reduce light transmission, you may want to raise your display brightness one or two notches. This is normal, not a defect.
For magnetic filters, installation is even simpler: attach the frame to the screen edges, snap the filter on, and remove it whenever you want full brightness or color accuracy back.
Frequently Asked Questions
Q: Does a privacy screen protector affect touch or Apple Pencil use? Most MacBooks do not have touchscreens, so this rarely matters. On iPad models, film protectors are usually pencil-friendly, but check the product page for confirmation before buying.
Q: Will it damage my MacBook’s display? No. Quality protectors use a soft adhesive or magnetic frame, not glue. They leave no residue and are fully removable.
Q: Does it work against vertical peeking — someone standing behind me? Standard filters are two-way (left/right). If you also need vertical protection, look for filters advertised with four-way or “360°” coverage.
Q: Will a privacy filter hurt my eyes? It reduces brightness, which can make some users squint more in dark rooms. Raising brightness and taking regular breaks solves the issue for most people.
Q: Can I still use Face ID or the camera? Yes — protectors designed for MacBooks include a camera cutout, so FaceTime, the webcam, and the microphone remain fully usable.
Final Thoughts
Shoulder surfing is a silent risk that follows every laptop user into planes, cafés, and open offices. A macbook privacy screen protector removes that risk physically — instantly, silently, and without draining a single percent of battery.
The 30° vs 60° decision comes down to one honest question: how much confidentiality do you need, versus how much brightness and viewing flexibility you want to keep?
- Maximum security, minimal compromise? Go with a 30 degree privacy filter.
- Strong everyday protection with better color and brightness? A 60° filter is your sweet spot.
- Doing both? Buy one of each and swap them by situation — your screen will be private exactly when it needs to be, and beautiful the rest of the time.
Either way, the first step is the same: stop letting strangers read your work, and take control of who sees your screen.